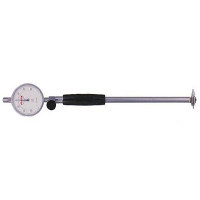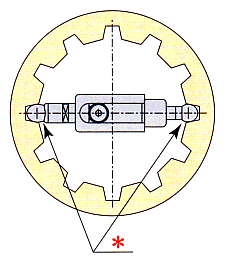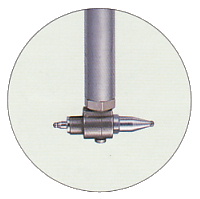
Peacock Cylinder Gauge for measuring OVERPIN Diameter of internal Gear
Code : CC-124A, CC-126A, CC-128A, CC-130A, CC-132A, CC-134A, CC-136A, CC-138A, CC-140A, CC-142A, CC-144A, CC-146A, CC-245A, CC-25OA, CC-255A, CC-260A, CC-265A, CC-270A, CC-275A, CC-280A
| Cylinder Gauge for measuring OVERPIN Diameter of internal Gear |
 Specifications ; CC-1A Series Specifications ; CC-1A Series |
| Model |
OVERPIN
diameter range
(mm) |
Effective
measuring
range (mm) |
Wide range
accuracy (µm) |
Adjacent
error (µm) |
Repeated
accuracy (µm) |
Rod (mm) |
Washer (mm) |
| CC-124A |
23.5~26.0 |
1.2 |
5 |
2 |
2 |
24 |
0.5, 1.0 |
| CC-126A |
25.5~28.0 |
1.2 |
5 |
2 |
2 |
26 |
0.5, 1.0 |
| CC-128A |
27.5~30.0 |
1.2 |
5 |
2 |
2 |
28 |
0.5, 1.0 |
| CC-130A |
29.5~32.0 |
1.2 |
5 |
2 |
2 |
30 |
0.5, 1.0 |
| CC-132A |
31.5~34.0 |
1.2 |
5 |
2 |
2 |
32 |
0.5, 1.0 |
| CC-134A |
33.5~36.0 |
1.2 |
5 |
2 |
2 |
34 |
0.5, 1.0 |
| CC-136A |
35.5~38.0 |
1.2 |
5 |
2 |
2 |
36 |
0.5, 1.0 |
| CC-138A |
37.5~40.0 |
1.2 |
5 |
2 |
2 |
38 |
0.5, 1.0 |
| CC-140A |
39.5~42.0 |
1.2 |
5 |
2 |
2 |
40 |
0.5, 1.0 |
| CC-142A |
41.5~44.0 |
1.2 |
5 |
2 |
2 |
42 |
0.5, 1.0 |
| CC-144A |
43.5~46.0 |
1.2 |
5 |
2 |
2 |
44 |
0.5, 1.0 |
| CC-146A |
45.5~48.0 |
1.2 |
5 |
2 |
2 |
46 |
0.5, 1.0 |
| Length below grip |
150mm |
|
Ball diameter |
ø2mm |
|
 Dimensions ; CC-1A Series Dimensions ; CC-1A Series
 |
 Specifications ; CC-2A Series Specifications ; CC-2A Series |
| Model |
OVERPIN
diameter range
(mm) |
Effective
measuring
range (mm) |
Wide range
accuracy (µm) |
Adjacent
error (µm) |
Repeated
accuracy (µm) |
Rod (mm) |
Washer (mm) |
| CC-245A |
44.5~50.5 |
1.2 |
5 |
2 |
2 |
45 |
0.5, 1.0, 2.0, 3.0 |
| CC-250A |
49.5~55.5 |
1.2 |
5 |
2 |
2 |
50 |
0.5, 1.0, 2.0, 3.0 |
| CC-255A |
54.5~60.5 |
1.2 |
5 |
2 |
2 |
55 |
0.5, 1.0, 2.0, 3.0 |
| CC-260A |
59.5~65.5 |
1.2 |
5 |
2 |
2 |
60 |
0.5, 1.0, 2.0, 3.0 |
| CC-265A |
64.5~70.5 |
1.2 |
5 |
2 |
2 |
65 |
0.5, 1.0, 2.0, 3.0 |
| CC-270A |
69.5~75.5 |
1.2 |
5 |
2 |
2 |
70 |
0.5, 1.0, 2.0, 3.0 |
| CC-275A |
74.5~80.5 |
1.2 |
5 |
2 |
2 |
75 |
0.5, 1.0, 2.0, 3.0 |
| CC-280A |
79.5~85.5 |
1.2 |
5 |
2 |
2 |
80 |
0.5, 1.0, 2.0, 3.0 |
| Length below grip |
150mm |
|
Ball diameter |
ø2mm |
|
 Dimensions ; CC-2A Series Dimensions ; CC-2A Series
 |
|


