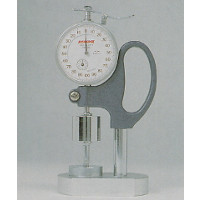
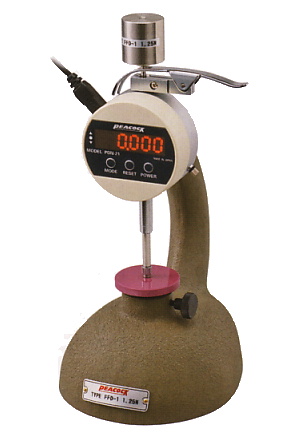
Peacock Constant Pressure Thickness Gauge
Code : FFG-1, FFG-2, FFG-4, FFG-5, FFG-6, FFG-7, FFG-8, FFG-9, FFG-11, FFG-12, FFA-1, FFA-2, FFA-3, FFA-4, FFA-5, FFA-6, FFA-7, FFA-8, FFA-9, FFA-10, FFA-11, FFA-12, FFA-13, FFD-1, FFD-2, FFD-3, FFD-4, FFD-6, FFD-7, FFD-8, FFD-10, FFD-13
Brand : Peacock
| Constant Pressure Thickness Gauge |
( Special Order )
|
|
 |
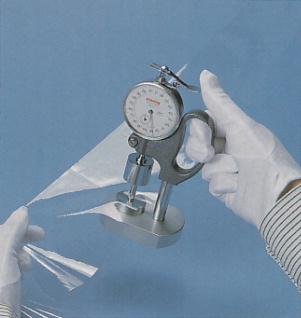
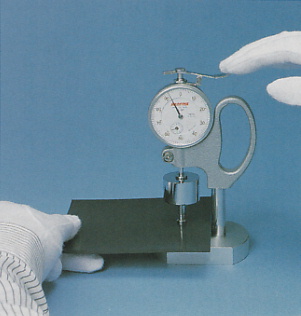
Constant Pressure Thickness Gauges comply with JIS standard and arrive ready
to measure film, artificial leather, urethane and a wide variety of sheet material. |
 |
Three types (FFG. FFA. FFD series) are available to meet your measurement. |
|
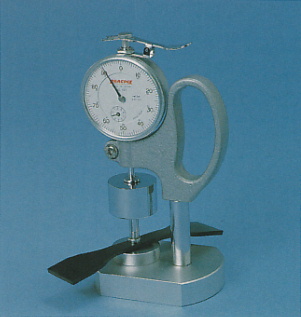
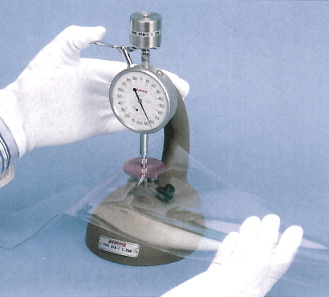
 Compact type FFG Series ( PAT. No. 3073347 ) Compact type FFG Series ( PAT. No. 3073347 ) |
 |
 |
 |
 |
| Measuring material |
JIS. NO |
Applied Model |
|
Z 1709 |
FFG-1 |
|
Z 1702 |
FFG-1 |
|
K 6783 |
FFG-1 |
|
K 6732 |
FFG-2 |
|
K 6328 |
FFG-4 |
|
K 6250A |
FFG-5 |
|
K 6250A |
FFG-6 |
|
K 6250A |
FFG-7 |
|
K 6250A |
FFG-8 |
|
K 6402 |
FFG-9 |
|
L 1096 |
FFG-11 |
|
L 1086 |
FFG-11 |
|
L 1018 |
FFG-11 |
|
L 1085 |
FFG-12 |
|
L 1086 |
FFG-12 |
|
|
|
|
 Specifications Compact type FFG Series Specifications Compact type FFG Series |
| Model |
Graduation
(mm) |
Range
(mm) |
Indicator error
(µm) |
Throat depth
(mm) |
Contact Point dia
(Ømm) |
Anvil dia
(Ømm) |
Measuring force
less than (gf) N |
Parallelism
(µm) |
| FFG-1 |
0.001 |
2 |
±10 |
24 |
5 |
30 |
1.25±0.15
( 125±15 ) |
5 |
| FFG-2 |
0.001 |
2 |
±10 |
24 |
5 |
30 |
-0.8
( -80 ) |
5 |
| FFG-4 |
0.01 |
10 |
±22 |
24 |
10 |
30 |
-0.8
( -80 ) |
7 |
| FFG-5 |
0.01 |
7 |
±22 |
24 |
5
( 19.625mm² ) |
30 |
0.2±0.04
( 20±4 ) |
5 |
| FFG-6 |
0.01 |
10 |
±22 |
24 |
8
( 50.24mm² ) |
30 |
0.51±0.1
( 51±10 ) |
7 |
| FFG-7 |
0.01 |
10 |
±22 |
24 |
5
( 19.625mm² ) |
30 |
0.44±0.1
( 44±10 ) |
5 |
| FFG-8 |
0.01 |
10 |
±22 |
24 |
8
( 50.24mm² ) |
30 |
1.13±0.26
( 113±26) |
7 |
| FFG-9 |
0.01 |
10 |
±22 |
24 |
35.7
( 10cm² ) |
40 |
-0.37
( -37 ) |
25 |
| FFG-11 |
0.01 |
10 |
±22 |
24 |
25.2
( 5cm² ) |
30 |
-0.35
( -35 ) |
20 |
| FFG-12 |
0.01 |
10 |
±22 |
24 |
16
( 2cm² ) |
30 |
-0.4
( -40 ) |
15 |
 Notification for made to order Notification for made to order |
Each material requires different measuring force,contact point diameter and unit size for JIS compliance.
Please list the approximate specifications according to your individual measuring requirements. |
|
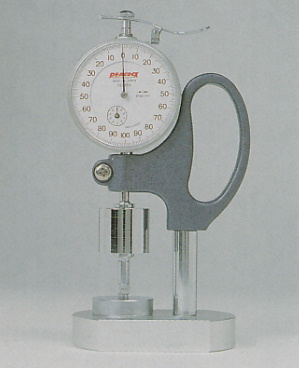
 Stand type FFA Series Stand type FFA Series |
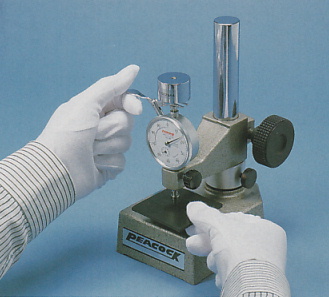
 1µm type ( integart part of Stand ) 1µm type ( integart part of Stand )
 |
 10µm type ( with damage prevention stopper ) 10µm type ( with damage prevention stopper )
 |
| Measuring material |
JIS. NO |
Applied Model |
|
Z 1709 |
FFA-1 |
|
Z 1702 |
FFA-1 |
|
K 6783 |
FFA-1 |
|
K 6732 |
FFA-2 |
|
K 6550 |
FFA-3 |
|
K 6505 |
FFA-3 |
|
K 6328 |
FFA-4 |
|
K 6250A |
FFA-5 |
|
K 6250A |
FFA-6 |
|
K 6250A |
FFA-7 |
|
K 6250A |
FFA-8 |
|
K 6402 |
FFA-9 |
|
L 1096 |
FFA-10 |
|
L 1086 |
FFA-10 |
|
L 1096 |
FFA-11 |
|
L 1086 |
FFA-11 |
|
L 1018 |
FFA-11 |
|
L 1085 |
FFA-12 |
|
L 1086 |
FFA-12 |
|
K 7113 |
FFA-13 |
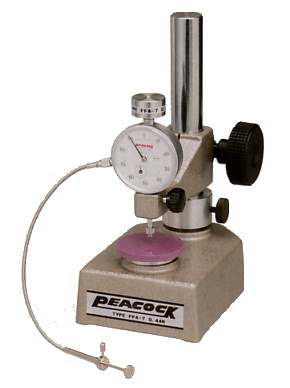
 FFA-8 FFA-8
 |
|
 Specifications Stand type FFA Series Specifications Stand type FFA Series |
| Model |
Graduation
(mm) |
Range
(mm) |
Indicator error
(µm) |
Throat depth
(mm) |
Contact Point dia
(Ømm) |
Anvil dia
(Ømm) |
Measuring force
less than (gf) N |
Parallelism
(µm) |
| FFA-1 |
0.001 |
2 |
±8 |
55 |
5 |
40 |
1.25±0.15
( 125±15 ) |
5 |
| FFA-2 |
0.001 |
2 |
±8 |
55 |
5 |
40 |
-0.8
( -80 ) |
5 |
| FFA-3 |
0.01 |
10 |
±20 |
55 |
10 |
50 |
3.93±0.1
( 393±10 ) |
10 |
| FFA-4 |
0.01 |
10 |
±20 |
55 |
10 |
50 |
-0.8
( -80 ) |
7 |
| FFA-5 |
0.01 |
7 |
±20 |
55 |
5
( 19.625mm² ) |
50 |
0.2±0.04
( 20±4 ) |
5 |
| FFA-6 |
0.01 |
10 |
±20 |
55 |
8
( 50.24mm² ) |
50 |
0.51±0.1
( 51±10 ) |
7 |
| FFA-7 |
0.01 |
10 |
±20 |
55 |
5
( 19.625mm² ) |
50 |
0.44±0.1
( 44±10 ) |
5 |
| FFA-8 |
0.01 |
10 |
±20 |
55 |
8
( 50.24mm² ) |
50 |
1.13±0.26
( 113±26) |
7 |
| FFA-9 |
0.01 |
10 |
±20 |
55 |
35.7
( 10cm² ) |
50 |
-0.37
( -37 ) |
25 |
| FFA-10 |
0.01 |
10 |
±20 |
55 |
11.3
( 1cm² ) |
50 |
-2.4
( -240 ) |
10 |
| FFA-11 |
0.01 |
10 |
±20 |
55 |
25.2
( 5cm² ) |
50 |
-0.35
( -35 ) |
20 |
| FFA-12 |
0.01 |
10 |
±20 |
55 |
16
( 2cm² ) |
50 |
-0.4
( -40 ) |
15 |
| FFA-13 |
0.01 |
10 |
±20 |
55 |
10
( 78.5mm² ) |
50 |
-1.57
( -157 ) |
7 |
 Notification for made to order Notification for made to order |
Each material requires different measuring force,contact point diameter and unit size for JIS compliance.
Please list the approximate specifications according to your individual measuring requirements. |
|
 Digital type FFD Series ( with data output ) Digital type FFD Series ( with data output ) |
 Digital type FFD-7 Digital type FFD-7
 |
 PDP-1N PDP-1N
 |
| Measuring material |
JIS. NO |
Applied Model |
|
Z 1709 |
FFD-1 |
|
Z 1702 |
FFD-1 |
|
K 6783 |
FFD-1 |
|
K 6732 |
FFD-2 |
|
K 6550 |
FFD-3 |
|
K 6505 |
FFD-3 |
|
K 6328 |
FFD-4 |
|
K 6250A |
FFD-6 |
|
K 6250A |
FFD-7 |
|
K 6250A |
FFD-8 |
|
L 1096 |
FFD-10 |
|
L 1086 |
FFD-10 |
|
K 7113 |
FFD-13 |
|
|
|
|
 Specifications Digital type FFD Series Specifications Digital type FFD Series |
| Model |
Graduation
(mm) |
Range
(mm) |
Indicator error
(µm) |
Throat depth
(mm) |
Contact Point dia
(Ømm) |
Anvil dia
(Ømm) |
Measuring force
less than (gf) N |
Parallelism
(µm) |
| FFD-1 |
0.001 |
20 |
±4 |
55 |
5 |
40 |
1.25±0.15
( 125±15 ) |
5 |
| FFD-2 |
0.001 |
20 |
±4 |
55 |
5 |
40 |
-0.8
( -80 ) |
5 |
| FFD-3 |
0.01 |
20 |
±20 |
55 |
10 |
50 |
3.93±0.1
( 393±10 ) |
10 |
| FFD-4 |
0.01 |
20 |
±20 |
55 |
10 |
50 |
-0.8
( -80 ) |
7 |
| FFD-6 |
0.01 |
20 |
±20 |
55 |
8
( 50.24mm² ) |
50 |
0.51±0.1
( 51±10 ) |
7 |
| FFD-7 |
0.01 |
20 |
±20 |
55 |
5
( 19.625mm² ) |
50 |
0.44±0.1
( 44±10 ) |
5 |
| FFD-8 |
0.01 |
20 |
±20 |
55 |
8
( 50.24mm² ) |
50 |
1.13±0.26
( 113±26) |
7 |
| FFD-10 |
0.01 |
20 |
±20 |
55 |
11.3
( 1cm² ) |
50 |
-2.4
( -240 ) |
10 |
| FFD-13 |
0.01 |
20 |
±20 |
55 |
10
( 78.5mm² ) |
50 |
-1.57
( -157 ) |
7 |
|
Display |
LED display For 0.001mm 5 digit For 0.01mm 4 digit |
|
Power supply |
AC adapter |
|
Data output |
BCD (dynamic) negative logic open collector. |
|
|
