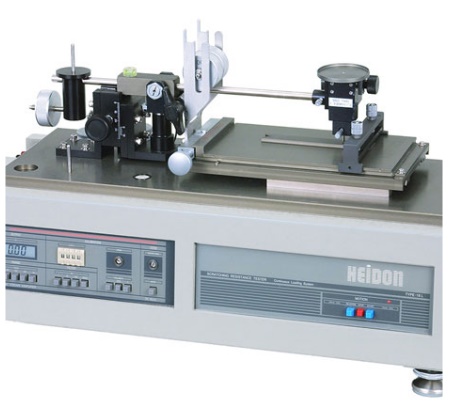
Indicates Scratch Resistance in Numerical Values using Continuous Loading
onical scratch needles are used, which have R-processed tips (various types between 0.005-1.0mm). As the mobile base loaded with the test piece travels, continuous loading is applied to the scratching needle by the weight rolling on the arm.
The travel distance is 100mm, and by replacing the continuous loading weight it is possible to select 0-50g, 0-100g, or 0-200g.
For example, by adding the 0-200g continuous loading weights to the 100g fixed loading weight that is already loaded, it is possible to obtain 100-300g loading.
Due to the use of a mechanical continuous loading device, troublesome calibration will not be required. Highly reproducible testing can always be carried out.
By using only the fixed loading weight without the continuous loading weights, the scratching hardness can also be obtained.
Scratching Testing ISO DIS 12 137-2
By scratching the surface of the flat plate sample surface using the scratching needle with the fixed load applied, and measuring the size of the scratch through observing with a microscope (prepared by users), the surface scratch resistance can be judged and evaluated.
If this is to be shown as numerical values, the TriboSoft data analyzing software (Option, only supported by the 18L) can be used to record the resistance incurred by the needle during scratching. The scratch resistance can be quantified from the size of the resistance.
Surface Destruction Strength Testing
While increasing the load continuously applied to the flat plate sample surface, the scratching needle is used to scratch over a fixed distance. By calculating the loading when scratching starts from the scratch start position, the surface strength can be comparatively evaluated.
By using the TriboSoft data analyzing software, it will be possible to monitor the scratching resistance. The changes in the load scratching resistance can be used to precisely determine the load that will cause impression or peeling off to occur for the surface during testing. (Resistance measurement is only possible in the 18L.)
JIS K5600 Pencil Hardness Related Testing
Concerning the flat plate sample surface, scratching is carried out using a pencil tilted at an angle of 45 degrees with loading of 750g to seek the core hardness that will scratch the surface and allow comparison and evaluation of the surface hardness.
Slippiness Measurement
Sliding the surface condition jig (option) on the flat plate sample, the resistance occurring between the sample and the jig is recorded on the recording meter. The surface static friction and dynamic friction are calculated, and comparison and evaluation of the slippiness is carried out.
Evaluation of Scratch Hardness from Scratch Width
Because scratching needle tips have been prepared between 0.005-1.0mmR, response is possible for thin films to thick films, and from soft films to hard films.
Based on specific vertical loading using conical needles, scratches are applied to the test piece and the scratching hardness shown from the width of the scratch.
600mm/min (1200mm/min during the return)
Reversible Motor
Rack and Pinion
100mm
Continuous Loading: 0-50, 0-100, 0-200g
Fixed Loading: 200g
TYPE:18 : –
TYPE:18L : 0-1000gf
TYPE:18 : –
TYPE:18L : Overloading Safety Equipment
High Frequency Noise Prevention Circuit
TYPE:18 : –
TYPE:18L : Zero Point Adjustment: Digital Servo Auto Zero Reset MethodOutput (Non-linear) ±5V ±0.05% FS or less)Sensitivity switching: 0, 100, 50, 25, 10% FSFilter: 1, 10, 100Hz, Pass
0-50℃ RH85% or less, non-condensing
AC100V 50/60Hz
Main Unit: W535mm x D225mm x H340mm
Combination Weights 1 set, Power Cable (2P with E, 2m) 1 piece,
Acrylic Cover 1 piece,
TriboSoft, Various Measurement Probes including Flat Indenter
